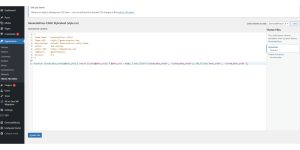
Customizing the WordPress admin panel can make site management more efficient, especially when handling multiple tasks. Using custom_menu_order, you can rearrange submenu items, helping you organize frequently accessed settings for quicker access. This guide will walk you through setting up custom_menu_order to create a tailored admin experience that simplifies site navigation.
What is custom_menu_order?

custom_menu_order is a function in WordPress that allows you to control the order of menu items in the admin dashboard. By enabling this function, you can reorder submenu items to prioritize settings and features that matter most to you. For more ways to customize WordPress, check out our guide on WordPress customization.
Why Customize Admin Submenu Items?
Customizing your admin menu makes it easier to find essential settings, which can improve productivity and reduce the time spent navigating the dashboard. For example, developers may want quick access to tools, while editors may prefer content-related settings at the top. If you’re building a site for clients, you may also want to learn about simplifying the WordPress interface for users.
Understanding the WordPress Admin Menu Structure
The WordPress admin area includes two main types of menu items:
- Main Menu Items: These are primary categories like “Posts,” “Media,” “Pages,” and “Settings.”
- Submenu Items: These appear under the main categories. For example, “General” is a submenu item under “Settings.”
WordPress loads these items in a default order, but with custom_menu_order, you can change the order to fit your needs better.
Enabling and Using custom_menu_order in WordPress
Let’s walk through the steps to enable and customize submenu items using custom_menu_order.
Step 1: Accessing Your Theme’s functions.php File
To start, you’ll need to access your theme’s functions.php file. This file controls many aspects of your theme and site functionality. You can find it by going to Appearance > Theme Editor in your dashboard or by using an FTP client to locate the file in your theme folder. To learn more about working with functions.php, see our functions.php customization guide.
Step 2: Enabling custom_menu_order

Once you’re in the functions.php file, you’ll need to enable the custom_menu_order functionality by adding a specific code snippet. Here’s the code you’ll use:
This code enables custom ordering in your admin panel.
Step 3: Customizing Submenu Order
Now, you can add code to set a custom order for specific submenu items. Here’s an example of how to customize the submenu order:
Each line represents a menu or submenu item. You can adjust this order by changing the sequence of these items in the code. Make sure to save your changes and check the admin panel to see the updated order.
Step 4: Testing and Adjusting Menu Order
After saving the functions.php file, go back to your WordPress dashboard to see if the menu order matches your customization. If something doesn’t look right, return to the functions.php file and adjust the sequence as needed. For a similar approach to organizing content, see our guide to managing WordPress posts.
Practical Use Cases for Customizing Admin Menu Order
Here are some scenarios where customizing the menu can be particularly helpful:
- Optimizing for Content Management: Editors and writers can move content-related options (like Posts, Pages, and Media) higher in the order for easier access.
- Streamlining Developer Settings: Developers might prioritize tools like Appearance, Plugins, and Settings.
- Simplifying the Interface for Clients or Teams: If you’re building a site for a client, you can arrange the admin menu to focus on essential items, hiding or moving less-used settings to create a simpler interface.
Advanced Customization Tips
If you want to take customization further, consider these additional tips:
- Using Custom Functions to Automate Menu Order: Create reusable functions in functions.php to save specific menu orders for different types of users.
- Combining custom_menu_order with Other Filters: Use
remove_menu_pageto hide certain menu items along with ordering, giving a clean and efficient layout for specific user roles.
Troubleshooting Common Issues
While customizing menu order is generally straightforward, a few issues may arise:
- custom_menu_order Not Taking Effect: If changes don’t appear, double-check that your code is saved correctly in functions.php.
- Syntax Errors in functions.php: Errors in your code can prevent changes from taking effect. Always check for typos or missing characters, and consider using a staging site for testing.
- Reverting to Default Menu Order: If you want to reset to the default menu order, simply remove the custom code from your functions.php file and save.
Conclusion
Using custom_menu_order to customize WordPress admin submenu items can make a big difference in how efficiently you manage your site. By following the steps outlined in this guide, you can create a streamlined and personalized dashboard that fits your workflow.
If you have questions or want to share your own tips for customizing the WordPress admin menu, please leave a comment below!