WordPress is the undisputed champion of content management systems, that is still rocking as hard as ever with no challenger in sight that would overtake its first place.
It’s practical, easy to use, safe, powerful, it literally has all of the ingredients to fulfill all of your website creating and managing needs. It can be hosted externally or internally, depending on your preferences, with a only few differences between the two that will compliment your current goals.
Want to set up a local #hosting environment for your #website but don’t know where to start? This article could be your perfect guide!
If you are ready to get your content out on the world wide web, your best bet would be going for external hosting. On the other hand, if you are still in the testing phase, you should lean towards local hosting.
Since that is the simplest explanation possible, not nearly enough for you to comprehend this matter fully, let’s dive deeper into exploring the other key things and benefits you should know about local hosting.
It’s incomparably faster
Local hosting doesn’t rely on connectivity and every change on it can be made in offline mode. Because of that factor, local sites run at much higher speeds, so your testing and installing tasks are completed much quicker.
Makes testing safe and easy

On local hosting, themes, plugins, widgets, buttons, and any other features can be tested out without the risk of creating a highly flammable concoction on your website by inputting the wrong combination.
Also, creating, installing, adjusting, and an unlimited number of other options can be played around with and executed trouble-free.
Enables debugging, troubleshooting, and updating
If you have ever encountered any type of difficulties on your website, especially the ones you are not familiar with, solving them may not exactly be a piece of cake.
On the contrary, if you reach for the wrong solutions, you could cause even bigger damage to your website than the initial problem.
In addition, running updates can cause unwanted changes on your website and a headache that could’ve easily been avoided.
But if you simply set up a local website, try out all the possibilities, examine the results, and only after doing that apply the proper changes to your live WordPress site. You most likely won’t be dealing with any of the mentioned issues.
Keeps everything private until you want to go public

A site on which you are performing all kinds of shenanigans with many different designs and outcomes isn’t something sharable with the eyes of the public, and that’s exactly where local hosting kicks in.
With local hosting, everything stays on your computer, available to only one user – you. It remains that way until you decide to go public. In addition, by using local hosting you might drastically save up on hosting costs in the long run.
Locally hosted websites give massive perks to developers and designers, but beginners too since it’s a great way to learn the basics of WordPress and poke around without fear of messing something up.
And although it’s a common misconception that setting it up requires some type of spellbook and hours of hard work. On the contrary, it can all be done in only a few steps using a simple procedure that requires a little bit of patience.
But before going into how that is done, we have to first get familiar with a little thing called XAMPP.
What is XAMPP?
XAMPP is the most popular PHP development environment that allows you to create an actual webserver from the comfort of your home (computer). Without XAMPP, to install a locally hosted website, there are a few things that you need to have:
- Web server software
- Knowledge in a programming language
- Database management software
But with XAMPP it’s a totally different story since it unites all of those requirements in one thing. How? Well, this explanation of the XAMPP acronym might give you an answer:
- X – Cross-Platform
- A – Apache
- M – MariaDB
- P – PHP
- P – Perl
Basically, the best definition of XAMPP would be, something that is simple to use, completely free, and your first step towards creating a locally hosted website. But how does one unlock these features? We will cover exactly that in the first chapter of our journey, in the explanation of the installation process.
Chapter I– Installing XAMPP
Step 1: Download XAMPP
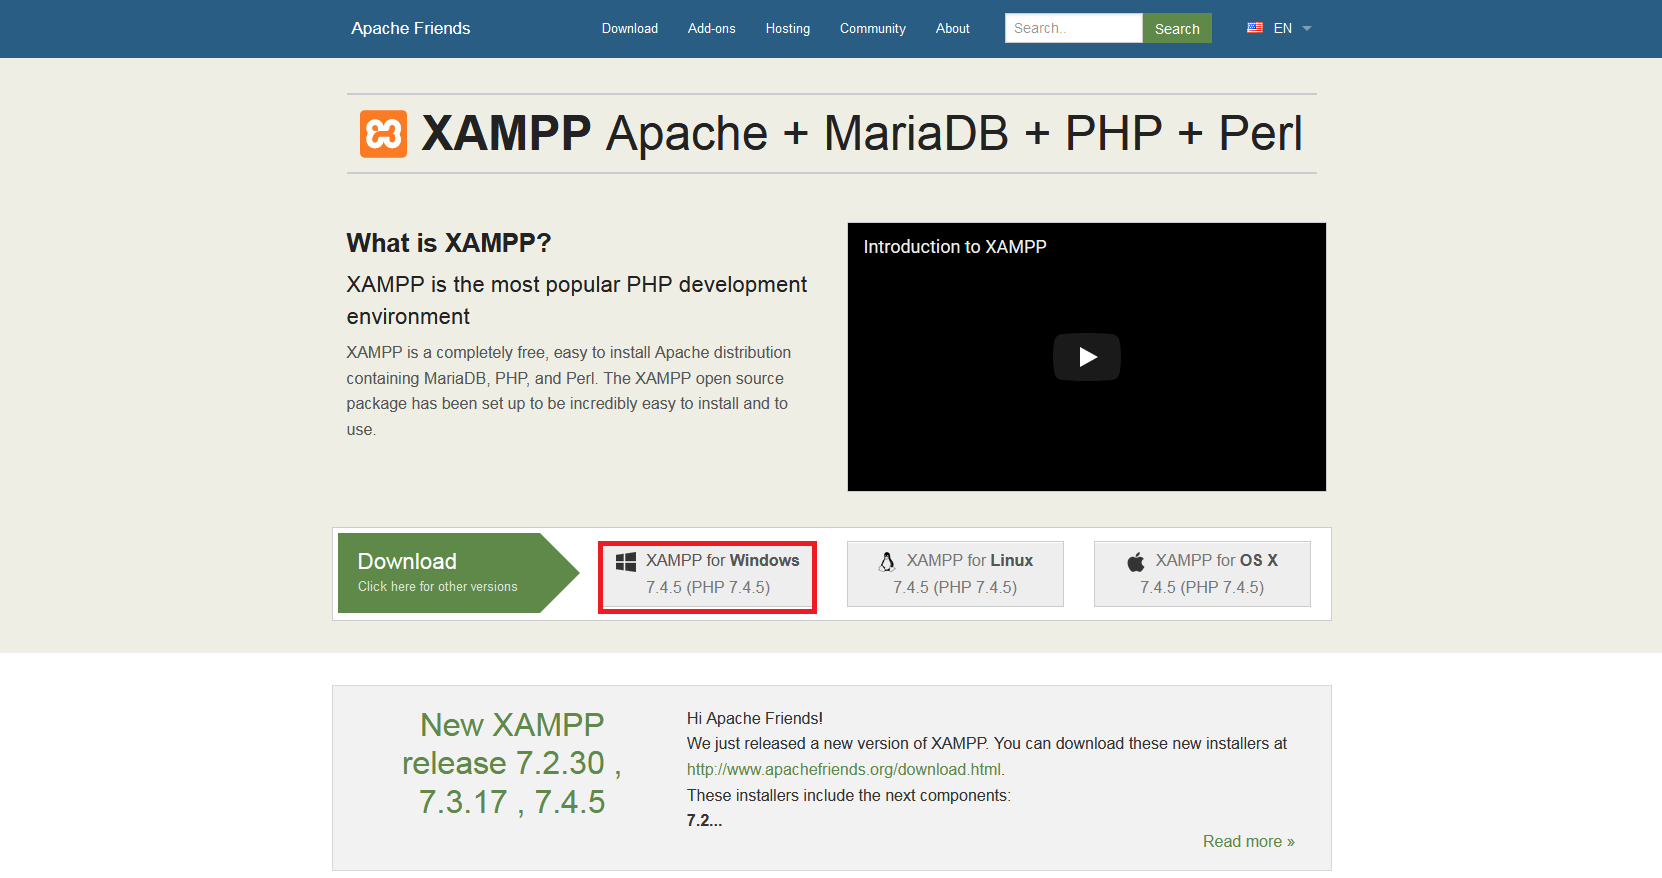
Our starting point will be the Apache Friends website where we need to download the XAMPP software. The newest version will be displayed right on their landing page (as highlighted in the picture), but you can click on the green arrow to check out other versions.
The newest version at the moment is 7.4.5 (PHP 7.4.5), so feel free to give the button labeled with it a click.
It’s extremely important to download the latest version since otherwise, the frequent updates of plugins, themes, and other add-ons could cause errors on your website, which will then require an update of XAMPP.
An older version could easily work out, but it’s just a matter of time before something malfunctions, and that usually happens at the worst possible moment when you are drowning in tasks and simply have no room for any other obligations.
Instead of getting caught by surprise and wasting your precious time on issues that could have been avoided, you should shift your focus towards getting those updates done.
When done in a timely matter, updating XAMPP isn’t a demanding procedure at all. But one that fits into only seven steps which are explained in the detail at this link.
Step 2: Installing XAMPP
Now that the file has finished downloading, it’s time to run the installation.
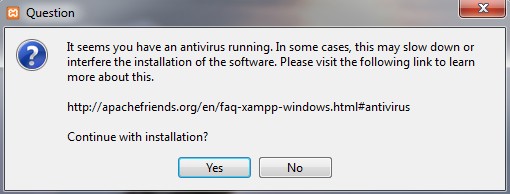
Double click on the file and then click once on “Run”. You may be presented with a message of warning if you are using antivirus software, but it’s nothing to worry about. Simply proceed by clicking “Yes”.
In addition, you might be presented with a User Account Control (UAC) warning. Get rid of it by clicking “OK”, and then “Next” on the forthcoming tab. After that, you’ll be presented with a tab that will display the components you want to install.
For WordPress, the components that you’ll need are:
- Apache
- MySQL
- PHP
- phpMyAdmin
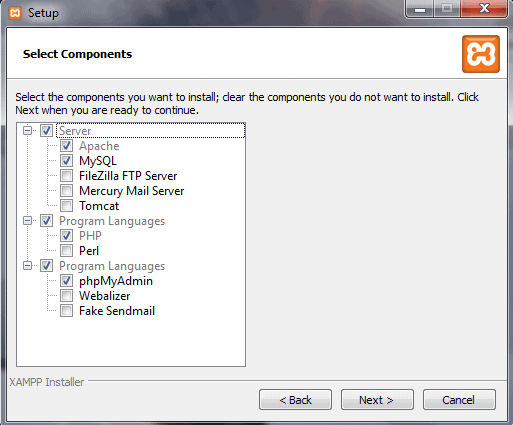
Feel free to uncheck the other boxes since we won’t need them at this instance, and follow that up by clicking on “Next”.
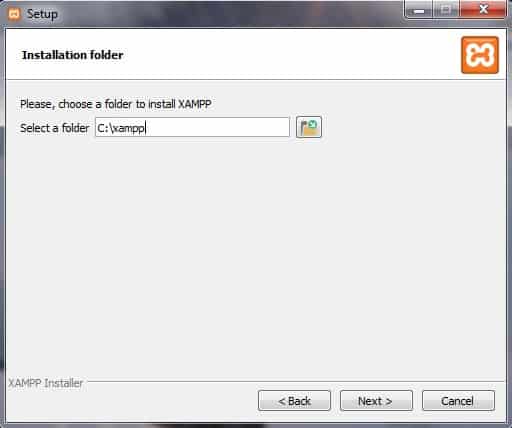
Now, you’ll be asked to select your destination folder where XAMPP files are going to be installed. There is no need to change this, just leave it on default.
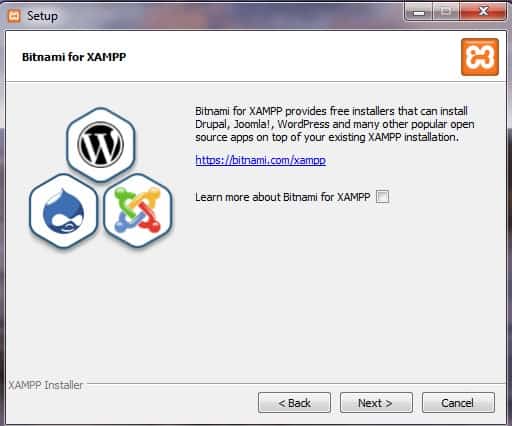
On the next few tabs, you’ll be asked to select your language of preference and whether you want to install Bitnami for XAMPP. Since we don’t need it to install WordPress, uncheck the box and click “Next”.
After this step, there is only one more “Next” left to click, on the tab that will notify you that the setup is ready to begin installing XAMPP on your computer.
Upon clicking it, the process of unpacking the files and installing the software begins, and it should be completed within a few minutes.

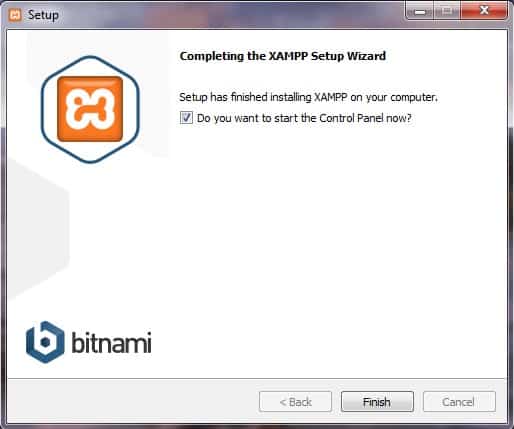
Once it’s done installing, a window will pop up saying that XAMPP has successfully been installed on your computer – congratulations!
In that window, there will be a checkbox that will ask if you want to start the Control Panel. Leave it on checked and hit the finish button. This will lead us to the configuring process of our XAMPP environment.
Step 3: Configure your environment and test your server
Once you’ve launched your XAMPP control panel, there are two modules that you need to run in order to continue with your WordPress installation, and those are Apache and MySQL.
You can do that by simply clicking “Start” next to the module. Again, there might be a Firewall popup that will require you to allow the Apache/MySQL HTTP server to communicate on your network.
For this option, you can check the box saying “Private networks, such as my home or work network” while leaving the box for the public network unchecked.
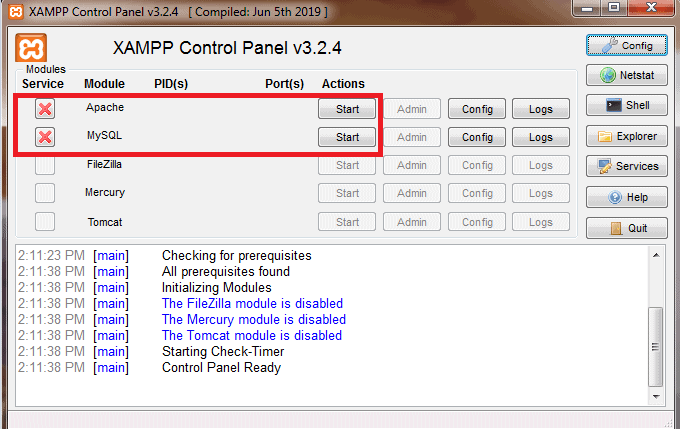
After starting the MySQL and Apache options, they should turn green which indicates that they are successfully running.
Now, go to your browser and paste http://localhost/ into your address bar. If everything went according to plan, you should now have a XAMPP server smoothly running on your Windows computer.
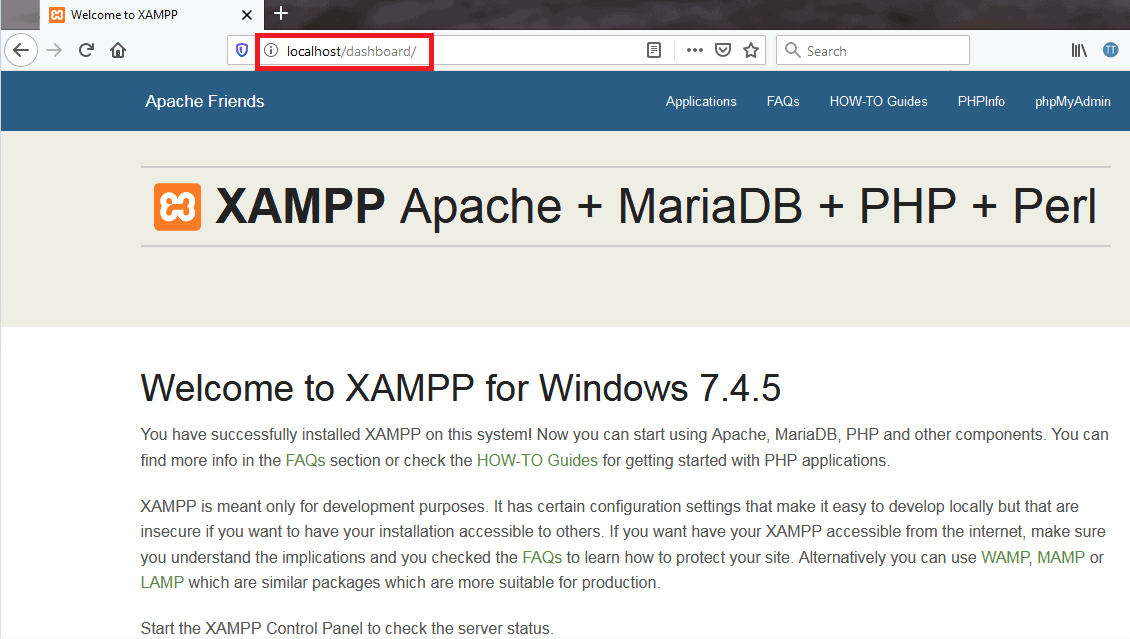
If you are presented with the same screen as seen in the image above, it’s time to put on your party hat because you’ve completed the first chapter of setting up your localhost environment.
Now it’s time to head to chapter II – introducing WordPress.
Chapter II – Install WordPress
Step 1: Download and extract WordPress files
Firstly, head to WordPress website, navigate to the top right corner, press “Get WordPress”, and follow that up by clicking on the download button of the latest version.
After waiting a few seconds, the file will be downloaded and it will finally be time for the polymerization of XAMPP and WordPress.
Go into “Computer” through your File Explorer and to the disk where you saved XAMPP (usually on “Local Disk (C:)”). When you open it, search for a folder called “htdocs”. This is the root folder of your server.
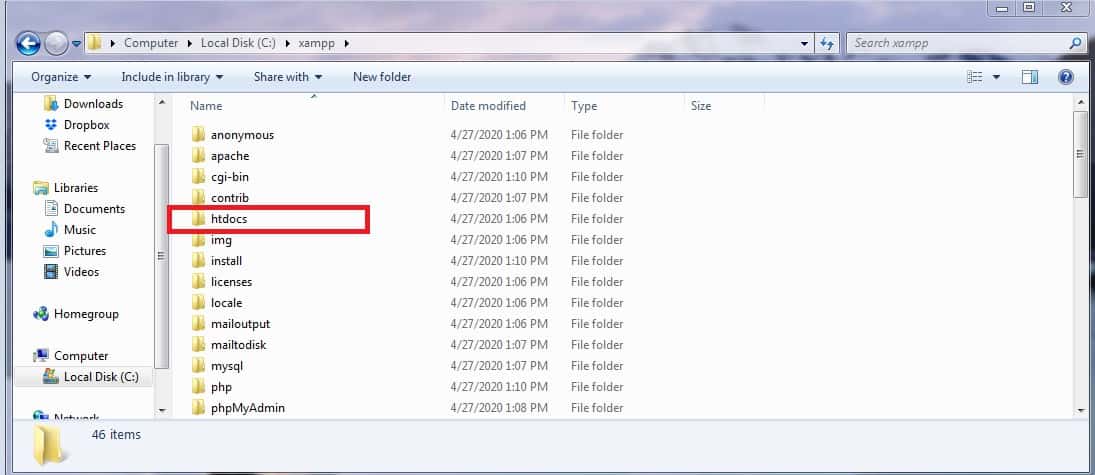
In this folder, we are going to create a test site. This is done easily, in only a few simple steps.
Firstly, create a new folder (we will call it “test” for demonstration purposes). In the created folder, now extract the WordPress .zip file that you’ve downloaded.
If everything was done properly, you can try out your site by typing http://localhost/test in your address bar (if you named your folder differently, the URL stays the same, just instead of “test” type in the actual name of your folder).
Step 2: Creating a database
We’ve reached the final few steps of creating your localhost WordPress website. The procedure moves on further with the creation of the database.
This can be done using two different methods: by pasting “http://localhost/phpmyadmin” into the address bar, or by accessing it through your XAMPP control panel.
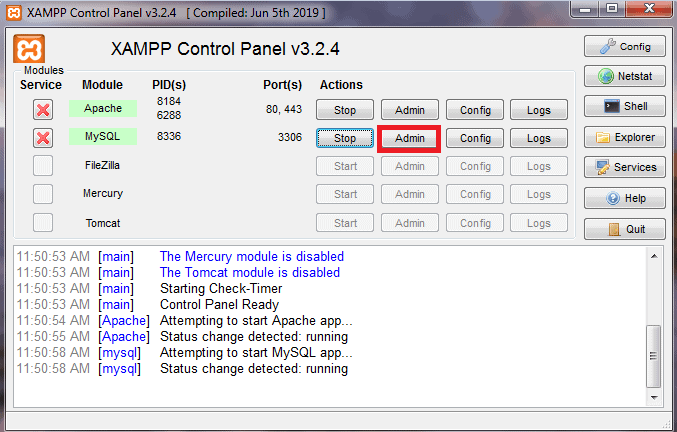
We will head to the XAMPP control panel and click on the “Admin” button next to the MySQL module.
After that, we will go into the “Databases” tab.
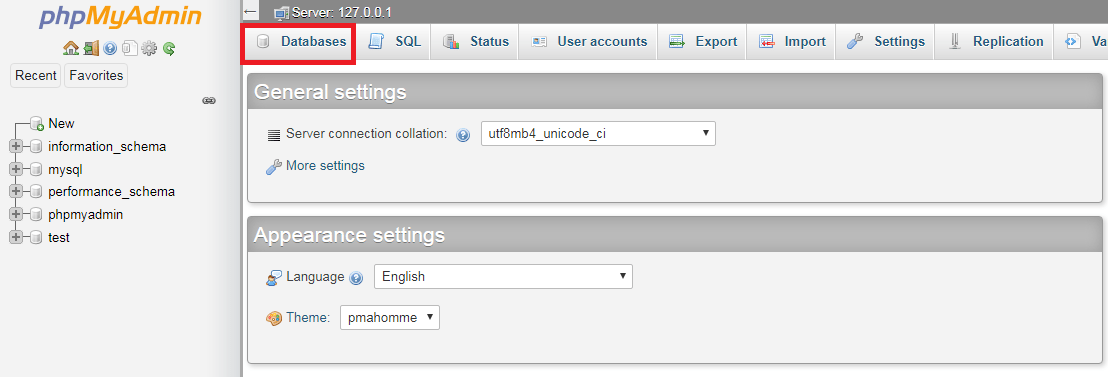
In this tab, type in your database name and click the “Create” button. I’ve chosen the name “TestWebsite” for my test database.
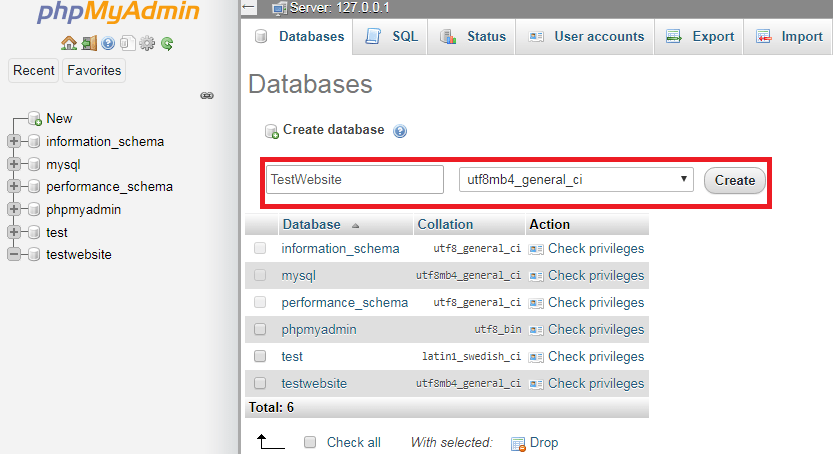
After hitting that “Create” button, your database should be successfully installed, which will be confirmed by a popup message.
Step 3: Install WordPress locally
For our last step, let’s head back to that http://localhost/test site. There you will need to choose your language of preference as seen in the image below.
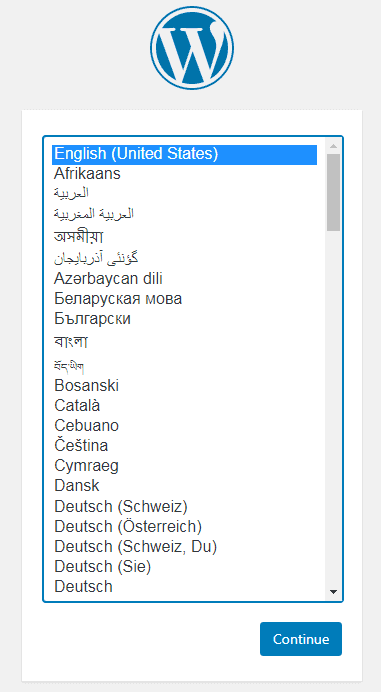
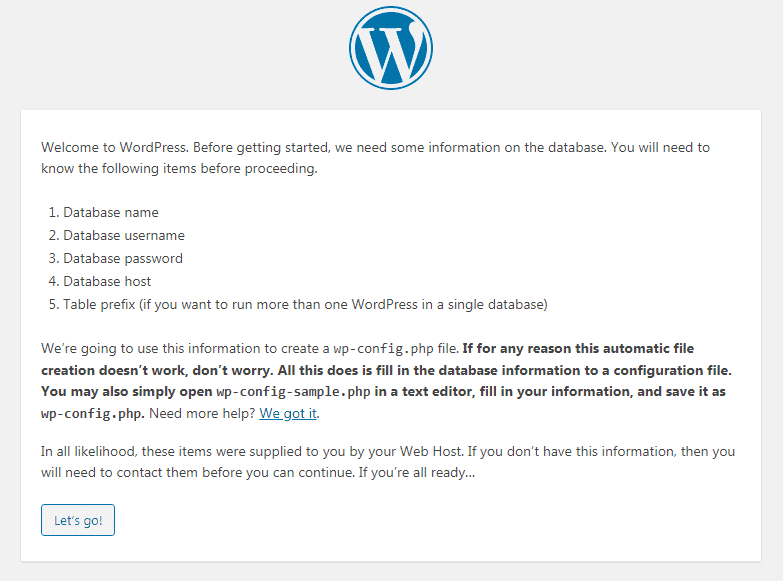
After clicking “Continue”, you will reach the welcoming page of WordPress where you will be informed on some basic things. Once you’ve read all of that, hit the “Let’s go!” button.
At this point you should have reached a tab on which some basic information needs to be filled out, according to the following guidelines:
- Database Name – the name you chose in the previous step
- Username – the username is always “root”
- Password – there is no need to set a password now, so leave it blank
- Database host – leave it on default (“localhost”)
- Table prefix – you can leave it on default as well, or change it if you prefer
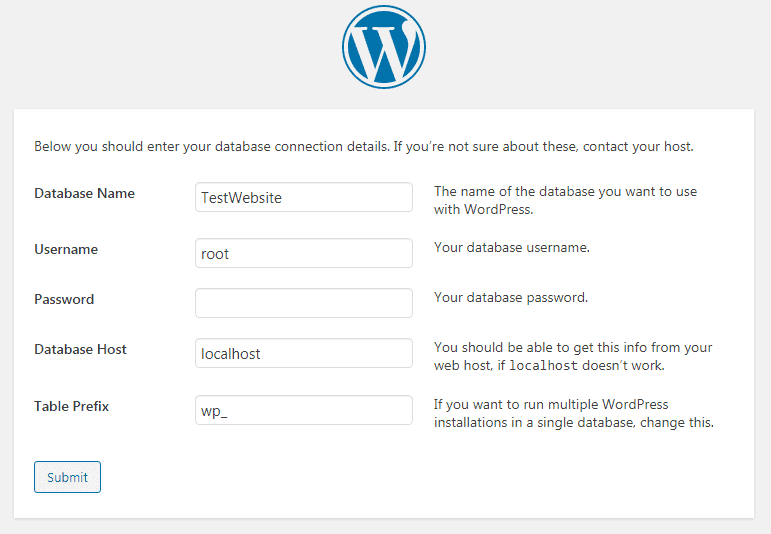
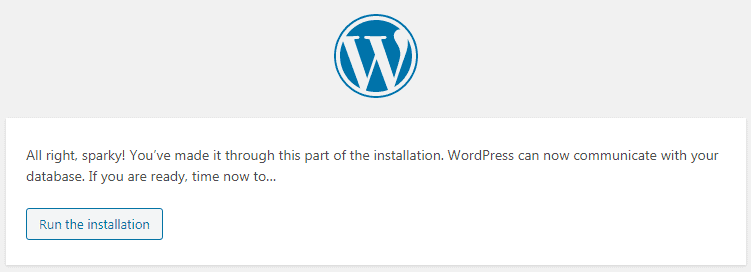
When done filling it out, click on the “Submit” button. This will then take you to your last form on which you only need to click the “Run the installation” option.
Next, we have a final few customizations to set before completing the installation. Those customizations being:
- Site Title – a title of your choice
- Username – a name that you’re going to use for backend editing
- Password – choose a strong one
- Your Email – for receiving info on updates or any other relevant things
- Search Engine Visibility – check the box to discourage search engines from indexing your website
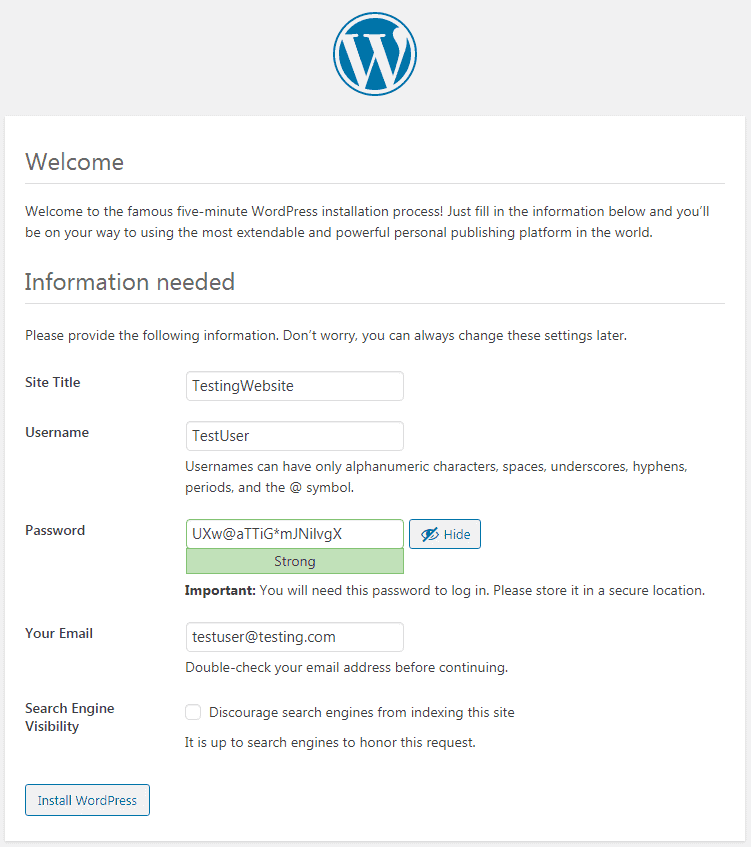
After filling out all of the fields, you will reach the final button labeled “Install WordPress”. Once you press it, you will be done and your brand new locally hosted website will be completed!
An extra piece of advice
Considering the fact that you will most likely be testing lots of WordPress sites and features in your local hosting environment, having a tool that can help clear out that environment is a good idea.
A tool like that is WP Reset!
In a nutshell, WP Reset is a WordPress plugin that can significantly speed up your site deployment, testing, and recovery using a series of reset features and tools.
From resetting your entire site to only specific aspects of it, WP Reset can do it all in seconds.
On top of that, it comes with a so-called collections feature that will enable you to compile a collection of your favorite plugins and themes ready for bulk installation at any time, as well as an automatic snapshots feature that will allow you to create restore points for your site using which you can rollback any changes you made to it.
To give you a more detailed introduction to WP Reset, the video below will do a pretty good job!
Conclusion
Setting up a locally hosted website offers tons of benefits that you can utilize in a lot of ways such as learning the basics of WordPress, testing themes/plugins/updates, and making all kinds of customizations without fear of causing damage to your live website.
On top of all that, everything you do on this type of website is executed smoothly, fast, without any risks, and in private until you choose to go public.
The entire procedure may have seemed like a tough nut to crack, but by following these steps and having a pinch of patience, you can get it all done in 15 minutes (give or take).
So now the only thing left to do is warm up your fingers up and start creating!