Adding your business’s real location is more important than you might think. Not only do you show your clients how close you are and what route to take, you make yourself seem more professional and reliable by adding more details about you and your business.
There are several different ways in which you can add #GoogleMaps to your site, but the most recommended one is to use a #plugin.
That way you don’t need to worry about making a mistake, especially if you are not really skilled in coding and web design, but it’s always a possibility to find a helping hand in webdesign agencies. And we also recommend using a plugin if maps and locations are important to your business and you frequently add maps to your posts.
The plugin we recommend you use is Google Maps Widget Pro. But there is also a free version you can download here. 
As with any other plugin, first, you need to download and activate it.
You can download the free version by going to the WordPress repository, locating the plugin and clicking on Install Now.
For the Pro version, you first have to search for it, then go to Settings > Google Maps Widget. And finally, open the Pro License tab and enter your license key. After that, just follow the on-screen instructions.
Google Maps API
Before adding the map, you need to generate your own Google Maps API key. To do this, open the Google Developers Console, choose Create a Project, and click Continue.
Under Add credentials to your project click the API key link, give it a name and finally click on Create. Then copy the key, go back to your WordPress site, then into Settings > Google Maps Widget Pro, paste the key, and save the changes.
Adding a Map
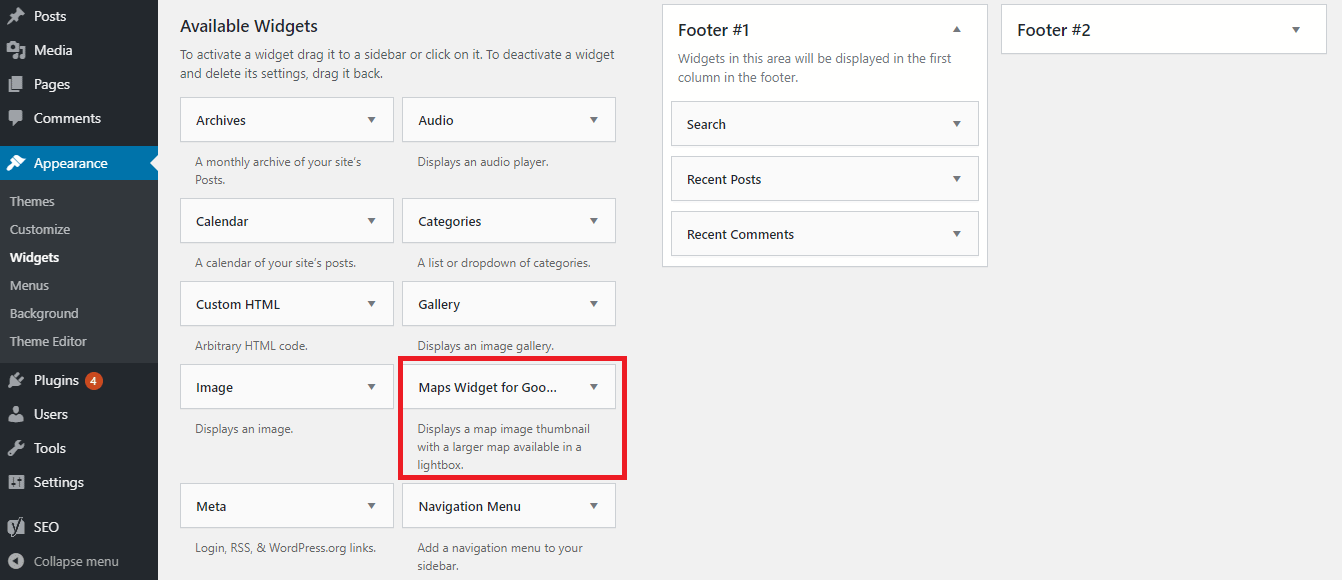
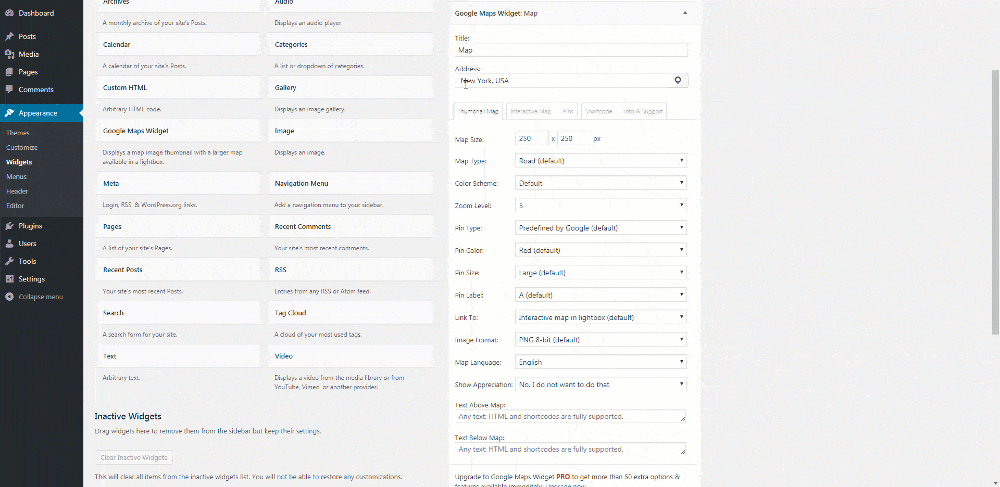
After installing the plugin, go to Appearance, then Widgets. Now, locate the Google Maps Widget Pro option and click on Add Widget.
Everything is really easy to use and you will have the map ready in less than 5 minutes. Also, the plugin has been designed to create responsive maps, so they will work equally as good on mobile devices, as well as on laptops and desktops.
After initiating the map creation process, you need to enter the address and the location you wish to show on the map.
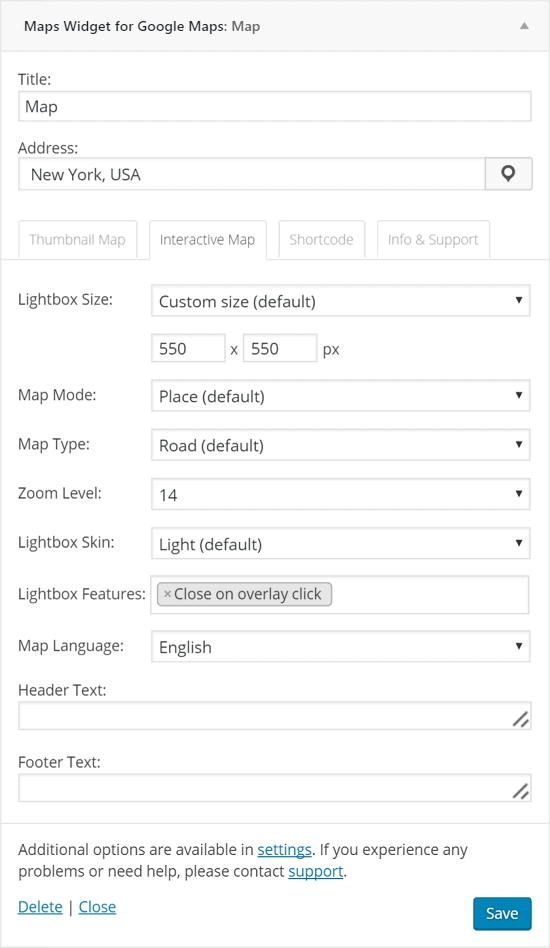
The plugin allows you to do some editing so you can choose the map size, its pin color, and the zoom level. You also can edit the lightbox settings in the Lightbox tab.
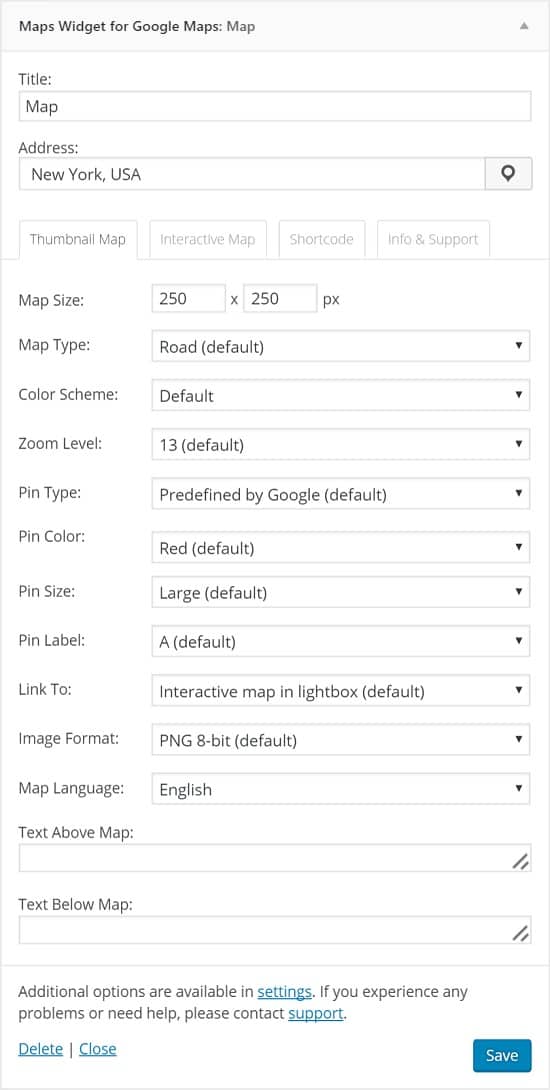
Lastly, remember to click on Save to set up all of the settings you chose, and the map will be ready for use.
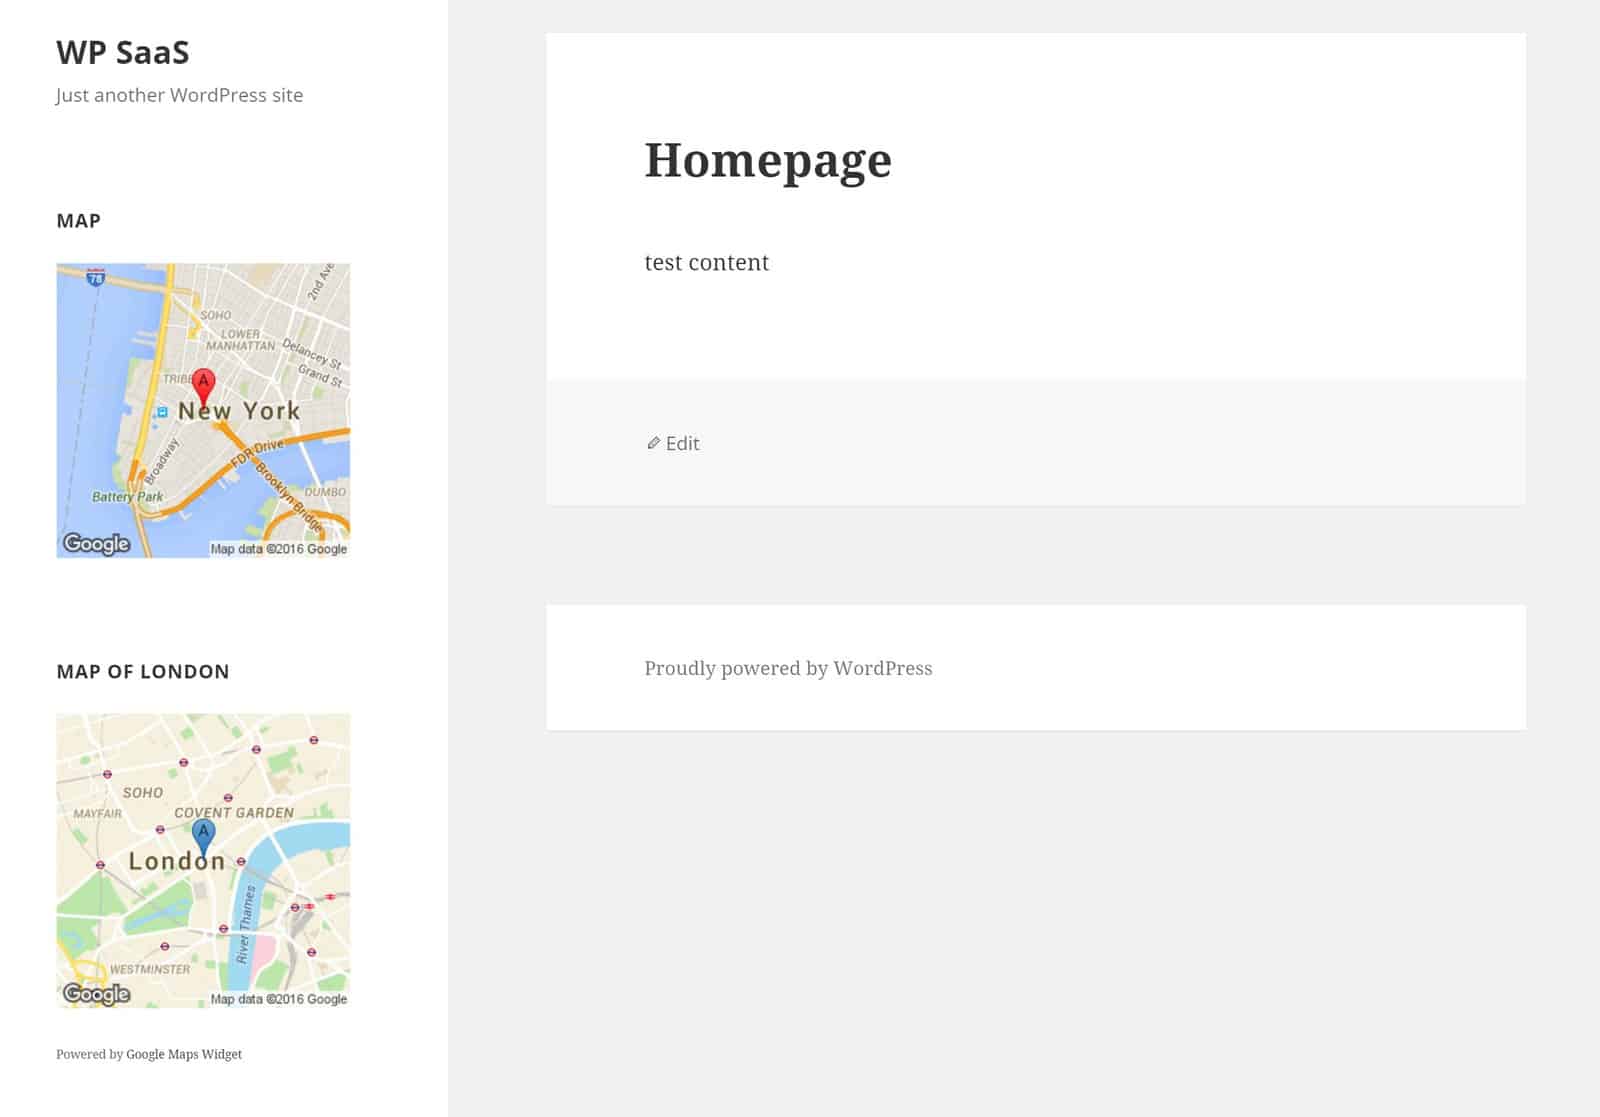
To see the widget and how it looks like on your site, just go to your site’s URL.
Features and Customizations
This plugin uses the Google Maps Static API for the Google Maps thumbnail and it loads the entire map in one request (compared to more than 20 requests some other plugins make). Having the map load in one request makes your site load as fast as possible so you don’t lose any of your page loading time.
Besides choosing the size and height of the map, you can choose what type of map you prefer (road map, satellite map, terrain amp, or hybrid map).
In the pro version, you also get to add a custom map image. On top of that, there are different color schemes you can choose from, and you can build any custom map style so everything matches your brand and site theme.
There are also different settings for the zoom level, pin type, size, and color, and an option to use the custom map pin icon.
You can add more than one pin with custom markers and descriptions to both thumbnail and interactive maps. However, when using this option, it is easy to clutter the map with too many pins. But, if you need to display them, you have no choice.
Luckily, you can use the Clustering option which is a method of grouping pins based on their distance from the current view. So instead of showing ten or more pins, the map shows just one special pin that displays the number of pins clustered within it.
To do this, go to Appearance, then Widgets. Open the interactive map settings, choose a cluster radius (small, medium, or large) and click Save.
There are different link types, such as the lightbox map, custom URL, interactive map, as well as an option to disable the link completely. The interactive map loads in the lightbox or as a replacement for the thumbnail Google map.
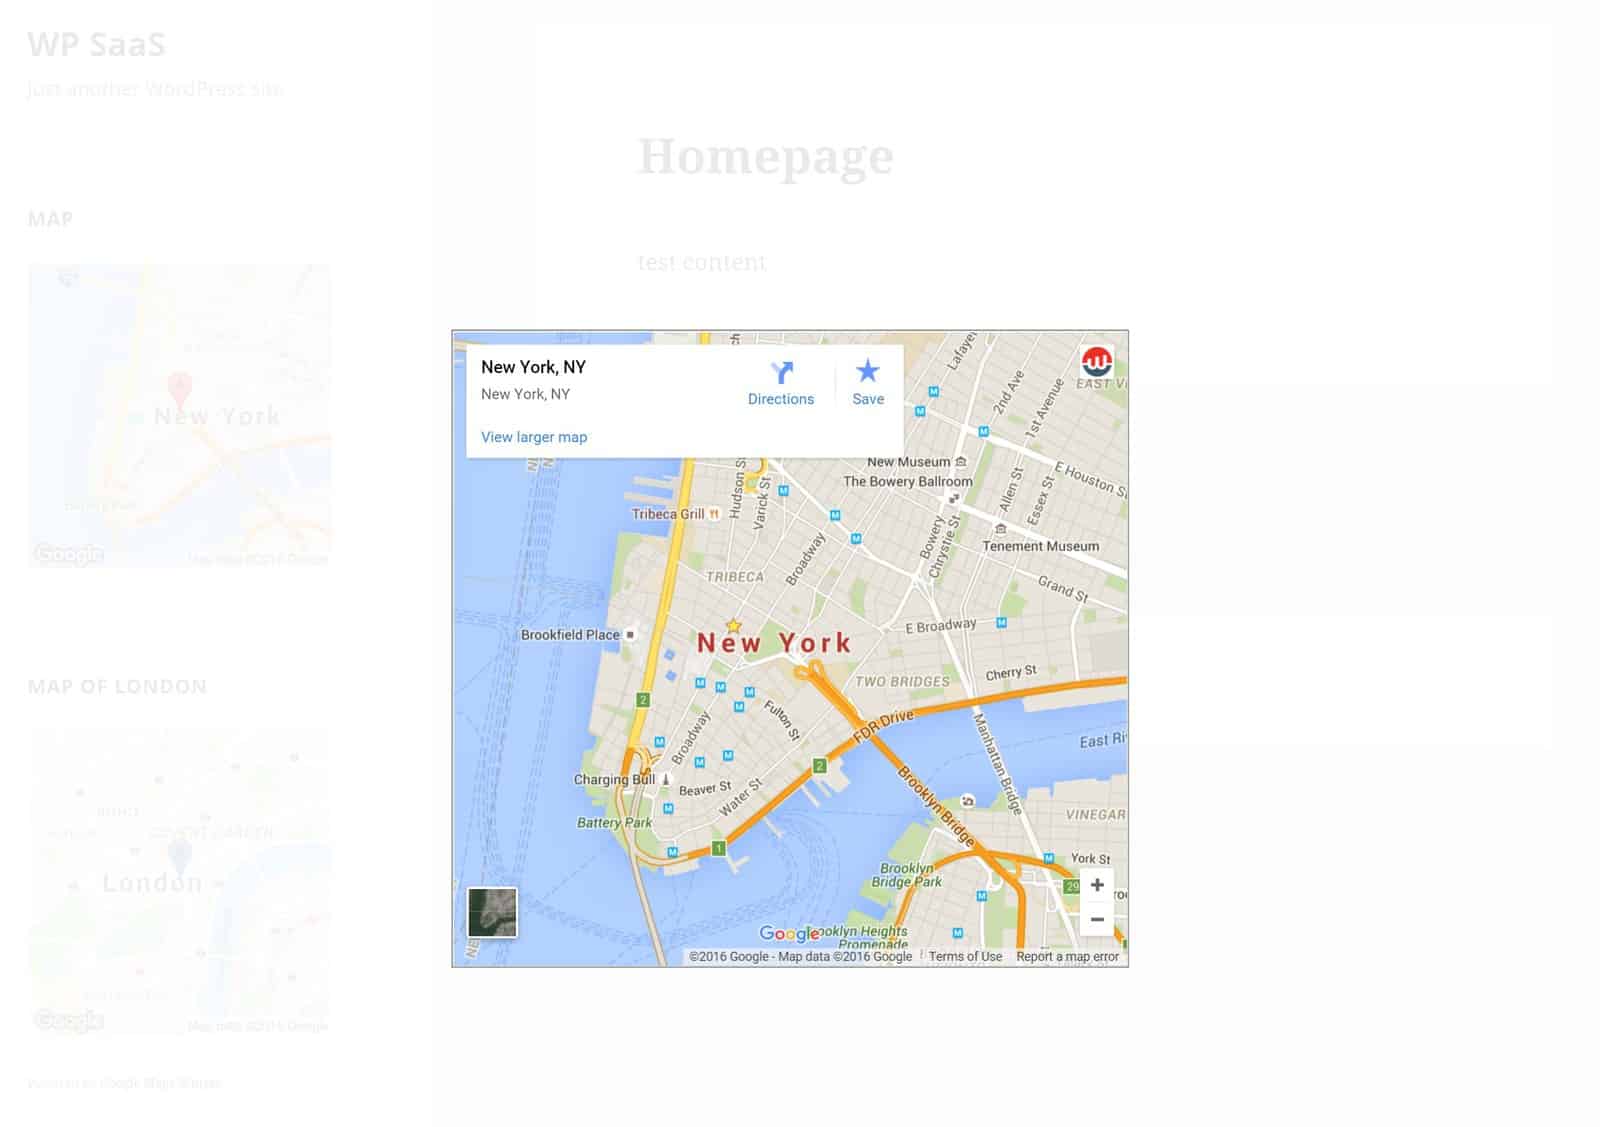
Also, the interactive map has five different modes, directions (shows a path from the entered address), place (pins the location on the map), search, street views, and views (no markers, clean map).
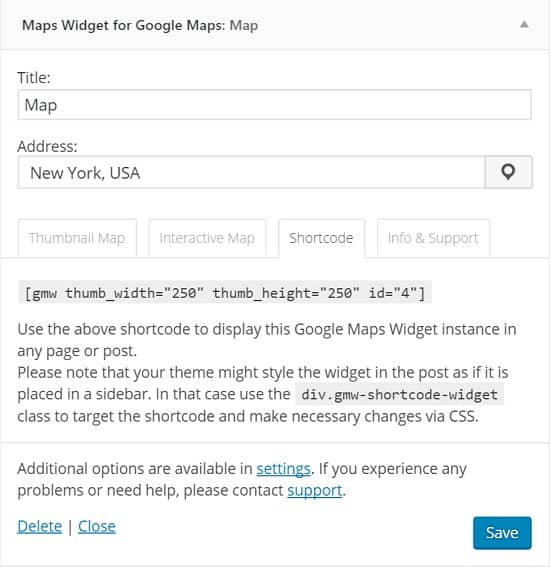
Add the Map Anywhere with a Shortcode
There is also a shortcode that lets you display and add the map on any page or post on your site. You just have to copy and paste it into a desired page or post.
Lastly, you can add some text below or above the Google map and choose the language in which to display the map.
On top of having all these features, this plugin is quite popular as more than 100,000 active users have it and are really satisfied with it. It is also frequently updated so you don’t need to worry that it suddenly won’t work.
Also, in case you have some trouble, the plugin comes with great support that will help you resolve any issues. And not just that, but different payment plans as well.
By using the plugin, you get access to Google Maps for free as it replaces the pay per view option with a map image thumbnail.
Lastly, in case you are using Gutenberg and need a map, here is the map block that you can install and activate. You can even track your maps with Google Analytics and include jQuery files.
Conclusion
Basically, this plugin lets you add a map to your site really easy and really fast. As you can see, no special coding skills are needed, you just need to follow the basic instructions.
There are many customizations available for the maps and you don’t need to worry that adding a map will slow down your site. So feel free to add as many maps as needed!