Text borders are a great way to make your content stand out, whether you’re highlighting a header, showcasing a testimonial, or drawing attention to a call-to-action. With WordPress, you have multiple options to add and style text borders, ranging from simple CSS tweaks to user-friendly plugins. In this guide, we’ll walk you through various methods to create eye-catching text borders that enhance your website’s design.
Why Add Text Borders in WordPress?
Text borders aren’t just for decoration—they serve practical purposes too. Here’s why you might want to use them:
- Draw Attention: Highlight important content like promotions, quotes, or headings.
- Improve Readability: Visually separate key information for better user engagement.
- Enhance Design: Add a professional touch that aligns with your site’s aesthetic.
Whether you’re a WordPress novice or a seasoned designer, adding text borders can elevate your site’s overall appeal.
Methods to Add Text Borders in WordPress
There are several ways to add text borders, depending on your tools and experience level. Let’s dive into the most popular approaches.
1. Using CSS (Custom Code)

If you’re comfortable with a bit of coding, CSS is the most versatile way to add and style text borders.
Steps to Add a Text Border with CSS:
- Access the WordPress Customizer:
- Go to your WordPress Dashboard.
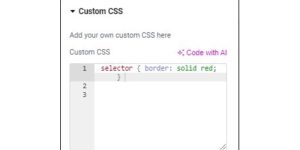
- Navigate to Appearance > Customize > Additional CSS.
- Add the Custom CSS Code: Paste the following snippet into the CSS editor:
- Border Thickness: Adjust
2pxfor thicker or thinner borders. - Border Color: Replace
blackwith your desired color code.
- Border Thickness: Adjust
- Apply the Class:
- In the Gutenberg editor or HTML, wrap your text in a
<span>tag or apply the.text-borderclass to a text block:
- In the Gutenberg editor or HTML, wrap your text in a
Why Use CSS?
- Maximum flexibility for design customization.
- Works seamlessly across WordPress themes.
Pro Tip: Use media queries to ensure your borders look great on mobile devices. For example:
2. Using the Gutenberg Editor

For users who prefer a no-code solution, the Gutenberg Editor provides a simple way to add borders through block settings and custom classes.
Steps to Add a Text Border in Gutenberg:
- Select a Text Block:
- Highlight the block (e.g., paragraph, heading) where you want the border.
- Add a Custom CSS Class:
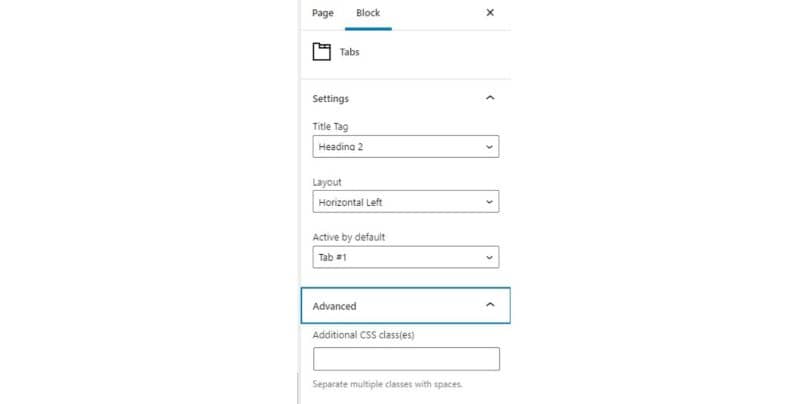
- In the right-hand settings panel, find the Additional CSS Class field.
- Enter a class name like
text-border.
- Define the CSS: Use the CSS snippet from the previous section to style the class.
Why Use Gutenberg?
- No extra plugins needed.
- Easy integration with your WordPress theme.
3. Using Elementor

Elementor is a drag-and-drop page builder that makes adding borders a breeze. This method is ideal for beginners who want a visual editor.
Steps to Add a Text Border in Elementor:
- Open Your Page in Elementor:
- Navigate to the page or post you want to edit.
- Click Edit with Elementor.
- Select a Text Widget:
- Drag and drop a Text Editor widget onto your page.
- Enter your text.
- Add a Border:
- Go to the Advanced tab.
- Find the Border section.
- Choose a border type (e.g., solid, dashed, or dotted) and adjust the width, color, and padding.
Why Use Elementor?
- Real-time visual editing.
- Perfect for creating complex designs without coding.
Styling Text Borders for Maximum Impact
Once you’ve added your text border, it’s time to refine the design. Here are some ways to customize your borders:
Customize Thickness, Color, and Style
Use CSS properties to tweak the appearance:
Add Padding for Better Spacing
Padding creates space between the text and the border:
Use Margins to Prevent Overlapping
Margins create space around the text block:
Create Responsive Borders
For mobile-friendly designs, use media queries to adjust borders on smaller screens.
Plugins and Tools for Adding Text Borders
If you’re not comfortable with CSS or want an even easier solution, plugins can help.
Recommended Plugins:
- CSS Hero: A visual editor for styling elements without writing code.
- YellowPencil: Offers real-time design customization, including text borders.
- Elementor: Allows you to add and style text borders through an intuitive interface.
These tools are beginner-friendly and allow for quick styling adjustments.
Troubleshooting Common Issues
Even with the best tools, you might encounter issues when adding text borders. Here’s how to fix them:
Borders Not Showing
- Ensure the CSS class is applied to the correct block.
- Check if your theme supports custom CSS.
Alignment Problems
- Use
display: inline-blockto keep text borders aligned with the surrounding content. - Adjust padding and margins to prevent overlapping elements.
Mobile Display Issues
- Test your design on different screen sizes.
- Use media queries to ensure responsive styling.
FAQs About Adding Text Borders
1. Do I need coding skills to add text borders?
No! Tools like Elementor and plugins like CSS Hero let you add borders without any coding knowledge.
2. Can I add borders to specific words or phrases?
Yes! Wrap the target text in a <span> tag and apply a custom CSS class.
3. Will text borders affect my site’s performance?
No, adding text borders has minimal impact on performance, especially when implemented with clean CSS.
Conclusion
Adding text borders in WordPress is a simple yet effective way to make your content pop. Whether you prefer the flexibility of CSS, the simplicity of Gutenberg, or the visual ease of Elementor, WordPress has the tools to make it happen. Experiment with styles, colors, and padding to create designs that resonate with your audience.
Have your own tips for styling text borders? Drop them in the comments below!