Dolphin Emulator allows users to play Nintendo GameCube and Wii games on a PC, but if you no longer need it or want to remove it for performance reasons, it’s important to uninstall it properly. Here’s a step-by-step guide on how to completely uninstall the Dolphin Emulator from your Windows 10 or 11 system.
Uninstall Dolphin Emulator via Control Panel or Settings

The first and easiest step to remove Dolphin Emulator from your system is by using Windows’ built-in uninstallation tools.
Uninstalling via Control Panel (Windows 10)
- Open the Control Panel. You can do this by typing “Control Panel” in the Start menu and pressing Enter.
- Click on Programs.
- Under Programs and Features, find Dolphin Emulator in the list of installed programs.
- Right-click on Dolphin Emulator and select Uninstall.
- Follow the prompts to complete the uninstallation.
Uninstalling via Settings (Windows 11)
- Open Settings by pressing Windows + I.
- Click on Apps from the sidebar.
- Select Installed Apps and scroll to find Dolphin Emulator.
- Click the three dots next to it and select Uninstall.
- Follow the prompts to finish the process.
How to Remove Residual Files and Folders?

Uninstalling the software itself is just one part of the process. To fully clean your system, you need to remove any leftover files.
Delete Files from Program Files
- Navigate to your C:\Program Files or C:\Program Files (x86) directory.
- Locate and delete the Dolphin Emulator folder if it exists.
Check the AppData Folder
- Press Windows + R to open the Run dialog box.
- Type %appdata% and press Enter. This opens the Roaming folder.
- Look for any folders related to Dolphin Emulator and delete them.
- Also, check the Local folder by navigating to %localappdata% and removing any related files.
Clean Registry Entries
Sometimes, even after uninstallation, residual registry entries can remain and affect system performance. You can remove these manually or use a third-party tool to clean the registry.
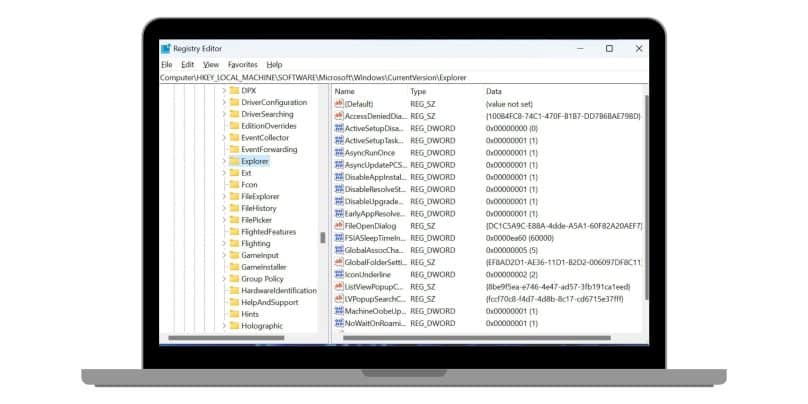
Manual Cleanup Using Registry Editor
- Press Windows + R to open the Run dialog, type regedit, and press Enter.
- Navigate to HKEY_CURRENT_USER\Software and HKEY_LOCAL_MACHINE\Software.
- Look for any folders or keys related to Dolphin Emulator and delete them.
- Note: Be careful when editing the registry. Deleting the wrong entries can cause system issues.
Using Third-Party Tools for Full Uninstallation
If you’re worried about missing some files or registry entries, you can use a third-party uninstaller tool like Revo Uninstaller. These tools scan your system for leftover files after the main uninstallation and help remove them.
- Download and install Revo Uninstaller.
- Launch the program and find Dolphin Emulator in the list.
- Select Uninstall and allow Revo to scan for leftover files and registry entries.
- Follow the prompts to remove all residual files.
Additional Tips for Complete Uninstallation

If you still encounter issues with Dolphin Emulator, here are some additional tips:
- Delete Hidden Files: Some files may be hidden in system directories. Enable hidden files by opening the View tab in File Explorer and checking the Hidden items box.
- Reboot Your PC: After performing all steps, restart your system to ensure that all changes are applied and there are no leftover processes running in the background.
- Check for Broken Shortcuts: If you still see Dolphin Emulator shortcuts on your desktop or in the Start Menu, right-click them and select Delete.
What to Do If Dolphin Doesn’t Uninstall Properly
Sometimes, you may face issues where Dolphin doesn’t uninstall completely or an error pops up. Here are a few things to try:
- Reinstall Dolphin: If the uninstaller fails, try reinstalling Dolphin and then uninstalling it again. This can fix any corruption in the original uninstallation process.
- Use System Restore: If things still aren’t working, you can try using System Restore to revert your system back to a time when Dolphin wasn’t installed.
- Manual Cleanup: As a last resort, you can go through your system and manually delete files, folders, and registry entries related to Dolphin.
Conclusion
Uninstalling Dolphin Emulator from your Windows 10 or 11 computer doesn’t have to be difficult. By following the steps above, you can ensure a clean removal, eliminating any leftover files or system entries that could affect performance.
If you encountered issues or have any questions, feel free to leave a comment below. Don’t forget to share this guide with others who may also be looking to uninstall Dolphin Emulator!