If you’re looking to change or remove your Freshdesk URL, perhaps for rebranding purposes or to use a custom domain, this guide will walk you through the process. Freshdesk is a popular customer support platform, and having a clean, personalized URL can give your support site a more professional look. Here’s a step-by-step guide on how to remove the default Freshdesk URL and replace it with your own.
Why Would You Want to Remove the Freshdesk URL?
Freshdesk typically assigns a default URL when you sign up, which looks something like yourcompany.freshdesk.com. While this URL is functional, some businesses prefer to use a custom domain for branding, professionalism, and better user trust. There could be several reasons why you may want to remove or change your Freshdesk URL:
- Branding: A custom domain, such as
support.yourcompany.com, looks more professional and is easier for your customers to remember. - Rebranding: If you’re changing your business name or domain, you’ll want your helpdesk URL to reflect that change.
- SEO Benefits: Custom URLs can be better optimized for search engines, improving your support site’s visibility.
Prerequisites Before Removing the Freshdesk URL

Before you begin, make sure you meet the following requirements:
- Freshdesk Plan: Check that your Freshdesk plan supports custom domains. This feature is available on the higher-tier plans (Estate, Pro, and Enterprise).
- Backup Your Data: Always back up your Freshdesk data before making any major changes. Although changing your URL won’t impact your existing tickets or users, it’s always good practice to have a backup.
- Custom Domain Availability: Ensure you own the domain you plan to use (e.g.,
yourcompany.com) and that it’s properly configured with DNS settings.
How to Change or Remove Your Freshdesk URL
Now, let’s go over the steps you need to follow to successfully update or remove your Freshdesk URL:
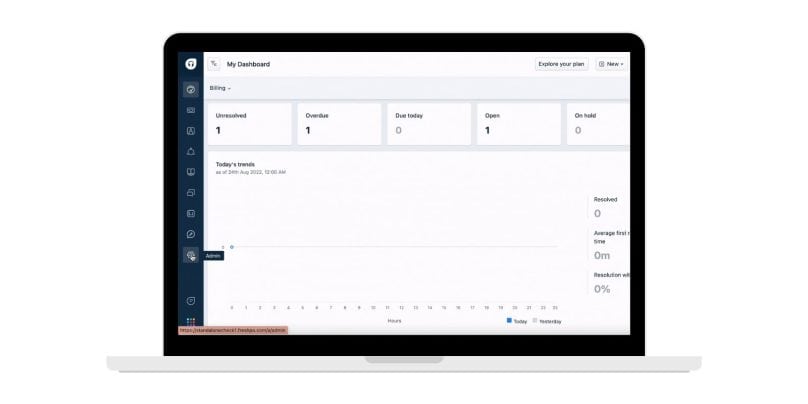
Step 1: Log in to Freshdesk Admin Panel
- Go to your Freshdesk account and log in as an administrator.
Step 2: Navigate to Helpdesk Settings
- Once logged in, click on your profile icon in the top right corner.
- From the dropdown menu, select “Admin.”
- Under the “Channels” section, click on “Portals”.
Step 3: Update Your URL Settings
- In the “Helpdesk URL” section, you will see your current Freshdesk URL, typically in the format
yourcompany.freshdesk.com. - To change it, click on “Edit” next to the URL.
- Here, you’ll have the option to replace it with a custom domain (e.g.,
support.yourcompany.com). - If you don’t want to use a custom domain, you can switch back to the default Freshdesk subdomain.
Step 4: Save Changes and Verify
- After making the necessary changes, click on Save.
- Freshdesk will guide you through setting up DNS records for your new custom domain.
- If you’re using a custom domain, ensure that you’ve updated the DNS settings correctly to point to Freshdesk’s servers. You may need to create a CNAME record for this.
Step 5: Check Your New URL
- After the changes are saved and DNS settings are applied (which can take up to 48 hours), check that your new URL is active.
- Test the new URL by visiting it in your browser and logging into your support portal.
Common Errors During URL Changes and How to Resolve Them
Here are some common problems you may encounter and solutions to address them before proceeding with the URL removal process.
Issue 1: “URL Already in Use” Error
- Solution: If you’re getting a message that the URL is already in use, this typically means another Freshdesk account is using that URL. Try a different subdomain or contact Freshdesk support to resolve the issue.
Issue 2: SSL Certificate Issue
- Solution: After switching to a custom domain, SSL certificates are essential for securing the domain. If SSL isn’t applied correctly, your new URL may display a security warning. To fix this, ensure that your SSL certificate is valid and properly installed on your server.
Issue 3: Emails Not Working After Changing the URL
- Solution: After changing the Freshdesk URL, emails sent from your support portal (like ticket updates) may not work correctly if your email settings are still linked to the old URL. Update the email settings in your Freshdesk admin panel to reflect the new domain.
Issue 4: Redirects Not Working
- Solution: If you’re having trouble with redirects from your old URL, you can manually set up URL forwarding or use Freshdesk’s support to ensure users are redirected to the new address.
What Happens After Removing or Changing the Freshdesk URL?
Now that you’ve successfully changed or removed your Freshdesk URL, it’s important to understand the potential effects this change might have on your support portal.
1. Existing Tickets and User Data
- Rest assured, changing the URL won’t affect existing tickets, users, or your helpdesk data. All your ticket history will remain intact, even after the URL change.
2. Redirecting Traffic
- If you have traffic directed to the old Freshdesk subdomain, ensure that proper redirects are in place. Freshdesk offers automatic redirects when switching to a custom domain, but you’ll want to verify that everything is functioning as expected.
3. Impact on Branding
- Removing or changing the URL can help reinforce your branding, making the support experience feel more integrated into your business’s overall digital presence.
Conclusion
Removing or changing your Freshdesk URL can enhance your brand’s online presence and provide your customers with a more cohesive support experience. By following the steps outlined above, you can easily update your Freshdesk URL and ensure everything functions smoothly. Remember to backup your data, update DNS settings, and test your new URL after making changes. If you run into any issues, Freshdesk’s customer support team is available to assist with troubleshooting.